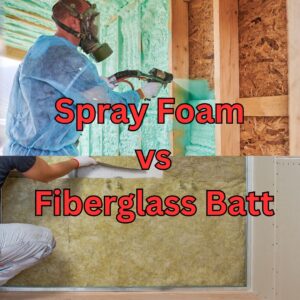
fbpx
Search
How to mud and tape a ceiling

How to tape and mud a ceiling

Drywall compound, often called mud, can be applied to ceilings in various designs. The designs add interest and character to the room and make a difference to flat ceilings. Additionally, they conceal imperfections, stains, and repaired areas. There are different types of drywall textures that you can also use for ceilings. These drywall textures include but not limited to are popcorn, orange peel, stomp, stippled, and swirl.

1. Prep the surface

Make sure to cover the floor, walls, and any furniture within the space with plastic sheeting, such as a tarp. When you apply the drywall mud, you may splash and drop tiny quantities. They are hard to get rid of from the fabric and can cause damage to furniture. Make use of masking tape to hold the sheets in position.

2. Wear your protective equipment

Wear a mask. It is also recommended to wear comfortable clothes since the drips may affect your clothes. Either wear coveralls or old clothes that you no longer wear.

3. Apply a thin layer of primer

Paint a thin layer of primer on the outside of your ceiling. Then, you can roll the rest of the ceiling using the help of a roller. Let the primer dry according to the instructions of the manufacturer.

4. Mix joint compound

Install an electric drill using an attachment for a paddle mixer. Combine the joint mixture until it is smooth. After mixing, the joint compound will resemble pancake batter.

Use coupon code TAPE10 to save 10% off your order. Limit is 1 per customer.

5. Use Joint compound

Make a dollop of the compound using the 5-inch knife for drywall. Be sure to remove any compound sticking to the edge of the knife. The compound should be dragged across to the joint of the butt. Scrape the excess compound off the blade and smooth the joints once more.

6. Apply tape

Place the tape in the middle joint and then use the knife for drywall to blend it in with the compounds. As tiny pieces of compound seep out within the tape, move them onto the top, making a light layer that will seal the tape.

7. Smooth the tape using joint compound

Take an 8-inch drywall blade with compound, and smooth it on your tape joints. Make sure the edges of the compound knife are accessible. Continue to patch joints in the ceiling until all joints are completely covered. For tapered joints, press your tape onto the joint using your fingers before applying the additional compound.

8. Install texture on the ceiling

Paint rollers are dipped in the drywall dirt. Rub off any excess, and then roll the roller along the sides of your bucket. Spread the mud on a tiny portion of the ceiling.

9. Stylize your texture or smooth your ceiling

Now that the texture has been applied to the ceiling, you can style it any way you like. You can read our blog post on different drywall textures to create the texture you want on your ceiling. While applying the texture, make sure to complete the pattern. The edges should be slightly overlapped to get the best look. If you’d like an even, flat ceiling, employ a taping knife or a skimming blade to flatten it.

Use coupon code TAPE10 to save 10% off your order. Limit is 1 per customer.

10. Clean it up and let it dry up

Let the texture of the ceiling dry for up to 24 hours. Paint as desired. Remove the plastic sheeting as well as the masking tape from any surfaces of the room.

More Posts

Drywall Safety Tips

Drywall Safety Tips

Drywall safety should be taken seriously. Serious injuries and fatalities are always a possibility when safety is not considered while working on a job site.
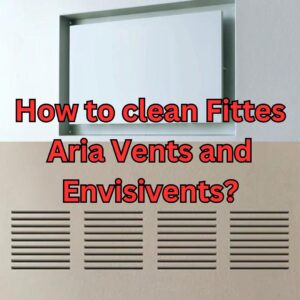
Subscribe to our Newsletter